
Writing a Deluxe Payment Exchange eCheck is just like writing a traditional paper check! Follow a few simple steps to make sure your check is created, signed, and sent!
- Choose correct account from Send Checks at the top of the home screen.
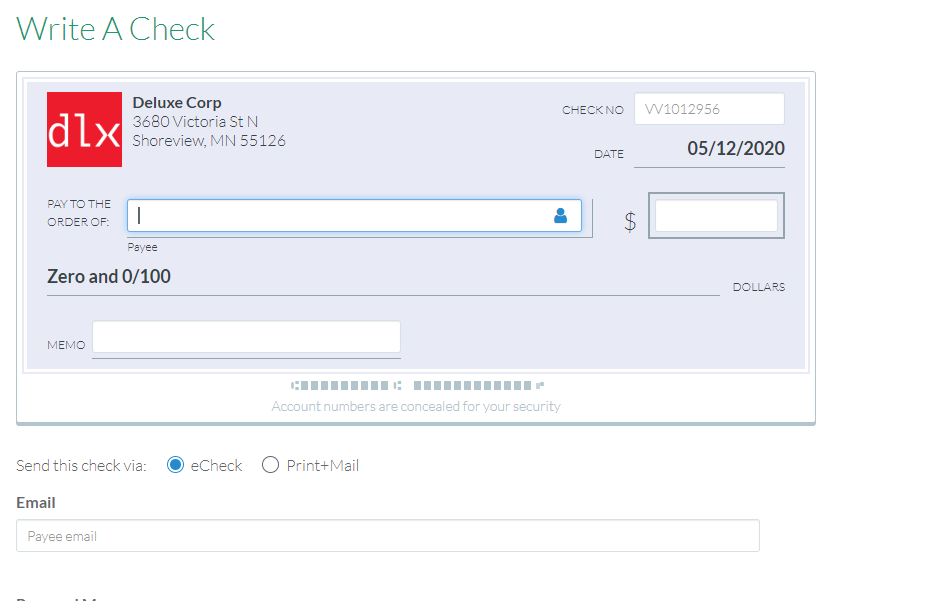
- Fill out your payee's name and the dollar amount.
Optional: Add a memo for your records (up to 49 characters, including spaces and punctuation).
Recommended, but optional: Fill out the payee's email below the check display.
Optional: Add a personal message to your payee. This message will be displayed in the body of the email they receive when you email the check.
3. Click create and sign.
Note: You will receive a notification letting you know the check will be delivered if an email is present. If you did not fill out the payee email, your check will not be emailed to anyone.
For users without the signing permissions, the check will only be created. Another member of the checking account may then visit the account activity/checks, select the check number, and select the sign check option to complete the transaction.
Comments
0 comments
Article is closed for comments.